Showing posts with label restoration. Show all posts

Saturday, 4 March 2023

Modernising the electronics of a vintage Singer 99k sewing machine

As I mentioned in my previous post when I was restoring the sewing machine, the electronics were in a pretty bad state.


I believe the pedal was meant to allow for variable speed input, but in reality it acted just like a simple on/off switch, and pressing the pedal down the whole way tripped the circuit breaker.

Inside the motor housing once
the rotor had been removed.

Initially I tried just repairing what was there, replacing brushes in the motor, cleaning it all up – which seemed to provide some temporary improvement but it soon deteriorated again.


So I decided to just try and replace all of the electronics with modern equipment, but retained the original casings to try and maintain the rustic aesthetic. I figured with modern advances in electronics it is quite likely that a lower power, modern motor would be able to provide comparable performance to the old one (the analogy that springs to mind is the state of modern cordless power tools versus old mains powered ones).

It is clear that the original motor does not have any kind of gearing to boost power – the circuit seemed to be about as basic and simple as it gets.

As I was researching the old motors I did see some mention about potential asbestos hazards – this is near the bushings of the motor – it is intended to support the bushing and act like a self-centering bearing. As I am entirely replacing the motor I had no need for it. With appropriate protective equipment in place I was able to remove it and dispose of it appropriately.

There was also mention about the being asbestos washers in the foot pedal, however my one does not appear to have these – but nonetheless I will not be using this pedal anyway.

One side the case of the me to opened up I was able to pull out the coil windings and rotor, leaving an empty shell. I removed the original connectors.


The screwdriver
To replace the motor I am going to use a cheap cordless screwdriver. Being cordless it should be adaptable to run on a lower power, but given the task that it is designed for, it should still be able to provide enough torque to run the machine due to it’s gearing set up.

In these cordless screwdrivers all the electronics tends to be in the handle, so it is easy to separate out the motor and gearing system from the rest of the device.


With that done I needed to trim off some of the casing to get it to a suitable size to fit in the sewing machine motor case. 

The screwdriver in it's mount

The only modification I needed to make to the sewing machines motor case was to drill out the opening slightly as the shaft of the screwdriver was a little bit wider, however this is not actually visible from the exterior.


To mount the screwdriver, I 3D printed a mount (Github/Thingiverse).

It's simply a friction-fit wedge that goes around the screwdriver body and into the sewing machines original metal case. 

The diameter of the shaft of the motor is the same as the original motors pulley, but worth bearing in mind that the new motor is slower. I had the idea to increase the diameter of the shaft, in order to change the gearing between the motor and the sewing machine and get a bit of a speed increase. It should also increase the grip on the pulley as there will be a larger surface area of the belt in contact with the shaft.


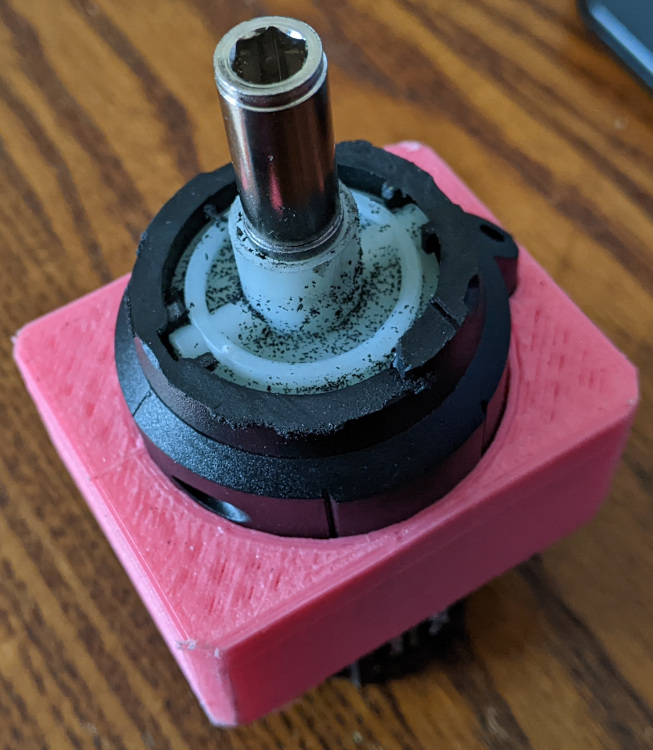
To do this I created this (Github/Thingiverse). It fits within a small section of aluminium tube (to prevent wear on the plastic), and over the shaft of the screwdriver. It's locked in place with an allen key (cut flush) that fits as if it were a screwdriver bit and locks into this plastic widget. Finally I locked it all together with some adhesive and wrapped a bit of grip-tape around the aluminium. 


Driving and control
To drive a motor I am using a BTS7960 motor driver, controlled by an Arduino (for now, for the purposes of prototyping).


Simply this will be an analog input, which the arduino will translate into pulse width modulation (PWM) and send to the motor driver. This is possibly overkill, but the priority at the moment is too get the machine working – optimization & improvements can come later.

For now, I have a simple potentiometer to set the PWM, and the pedal is actually just a switch cable tied to the legs of the sewing machine. I am hoping to be able to get a treadle foot pedal like those that would have traditionally been part of the table legs that I’m using, and use that – if I’m ever able to find one.


Pulley Belt
The belt connecting the motor to the machine was worn through and hanging on by a thread, so it needed replacing.

There seems to be a lot of various DIY how-to ways suggested to create pulley belts to size, so I started working through those. The results were:

  • Pulley belt from an old printer cut to size and stitched together using fishing wire - failed - snapped.
  • As above, but joined with glue and stitched - snapped.
  • Electrical wire (speaker cable) threaded together, and heat-shrunk to provide a rubberised grip. This seemed promising - it didn't snap at least, but the heat shrink, although intended to provide grip, seemed to have the opposite effect.

After all that, as a temporary measure, I joined 3 nylon cable ties together, just so I could move on to the rest of the project. And as the saying goes "There's nothing more permanent than a temporary fix", it's still going strong.


Light
The motor housing also contained a small lamp fitting. This was previously a mains powered, incandescent, bayonet fitting bulb. However I rewired and replaced this with a 12v LED bulb – much in the same way the I did with the Sunset Sarsaparilla lamp project.


Power
Power was provided by an old desktop computer power supply. This provides 12v lines for driving the motor and the light, and 5v for the logic. Again, this is another quick prototyping move, and will eventually be replaced by something nicer.

Finally all that was left was to oil the machine as indicated in the original manual, and give it a try.


Sunday, 21 August 2022

Singer sewing machine table

The finished product


The Beginning

This old Singer sewing machine belonged to my grandparents, and then spent years left in my parents garage until I got interested in leather work and took it, wondering if it might be usable for that.

Although the machine itself seems mechanically sound the electronics seem to be trashed.

Using it trips the circuit breaker, the belt from the motor to the machine was hanging together by a thread, so all in all, not very successful.

To begin with, I removed all the electrical pieces - the machine can still be hand-operated without them, and I wanted to make use of it, so I could always return to those later.


I'd seen similar sewing machine models that were part of a table or cabinet set-up, with cast iron legs and treadle operated.

I'm told that this machine originally used to have one, back when it was my grandparents', but they have since been lost to the sands of time.

I was hoping to be able to recreate that, but it seems they are rather sought-after by trendy people turning them into side tables, which has pushed the price up considerably.

So, instead of going for an accurate restoration, I opted for an 'inspired by' build. 


The base of the machine is quite thick, due to the mechanical workings underneath the machine, but for using it on a worktop, the step can be quite annoying, so my idea was to make a butcher-block style surface, which the machine can be recessed into.


I opted to build my own butcher block from pallet wood, to keep costs down, and to give myself an excuse to buy a planer/thicknesser (still worked out cheaper than just buying a butcher block!)


I'd aimed for a maximum dimensions of 100cm x 50cm table surface, in order to fit the space I'd allocated for putting the table in my home.

The bulk of the butcher block construction is simply, plane, thickness, trim, glue, clamp, wait, repeat.

Rather than build one solid block and cut the recess for the sewing machine in, I decided to build the block in four different sections - full-length front and back sections, and then two shorter side sections, leaving a gap in the middle to form the recess.

This allowed me to cater for space constraints in the workshop, tool limitations (maximum width of the thicknesser), and to make use of the shorter lengths of pallet wood.

I also opted to offset the recess to move the machine towards the right of the tabletop, to increase space on the left hand side, which is where the sewing would be done.

The four main segments - the blue area is where the sewing machine will be recessed


Before

 
After

Once that was done, the edges were straightened up and some strips of mahogany were attached to the end to cover the end grain, and tidy-up the design.

3 coach bolts were added and recessed on each side to provide some mechanical retention and also to add to the rustic-industrial aesthetic.


The gap in the middle was by design slightly smaller than the footprint of the sewing machine - this allowed me to cut a rebate to size and provide a platform for the machine to sit on.

Additionally the machine has 2 hinges, which although I needn't use them (as I have access to the underside of the machine from under the table top), they are cast into the frame of the machine, so had to drill recesses for them also.

I also cut recesses for the latches from the original case, and mounted those into the surface, so that I could use the lid from the case.


Legs

By this time I'd managed to find a set of the cast iron treadle legs, but unfortunately without the treadle. Nonetheless, they still made a good stand.


Thursday, 9 September 2021

Late 1940's / Early 1950's Zippo Restoration

Taking a break from all the DIY-heavy home improvement projects, I found this rusted out Zippo lighter at a flea market.

I've always been a fan of Zippos, their style (and that unique sound) is incredibly iconic, so I figured I'd have a crack at restoring it.

Plus I still have a bunch of spares left over from the trench lighter project I did a while back.

Before starting, I did some research to try and put a date on the lighter, just in case it was something super-rare.


The first thing to so is to check the stamp at the bottom of the case:

According to the table provided by Zippo themselves, based on the logo type and the patent number, this lighter was manufactured in the 1937-1950 date range.

Digging through some other online resources, I found that it could be dated further by the chimneys number of holes, and the pattern of the flint wheel.

Depending on the source, the chimney having 8 holes per side dates it as being from late 1946 or 1947 onward.

The diagonal-cut flint wheel puts it also at 1946 onward.

Finally, the hinge (again, depending on the source), puts it at either 1948 or 49 onward

So between all that, it looks most likely that this lighter was produced between 1948-1950.

It's pretty cool to know the lighter has some history to it, but it doesn't make it a massively rare artefact.

Removing the rust

The rust on one side in particular was quite thick. To remove it I started with a small rotary tool wire wheel, then moved to some high-grit sanding discs, before some wet and dry sanding by hand to even out some scratches, finally finishing up with a number of passes with the buffing wheel and polishing compound.

As much as I am trying to preserve the original chromed finish, it was clear even before starting that it had worn through in places - I was merely trying to not make it any worse.

However with that lot done, although it's not exactly 'showroom' quality, the lighter has it's shine back, but retains a lot of it's characterful aging which suits it's age.


Flints & Wicks

The obvious thing to note is that it's not functional. To start with, there was no flint to make a spark. Thankfully the flint spring was still there, so adding one of my spares was all it took to get it sparking again.

The wick had been worn down to nearly nothing as well. I thought that I would likely need to replace it, so had a spare to hand, but it appears as though there was still plenty of wick remaining to pull through. It's quite possibly that the previous owner just never knew to do this - or had lost the flint before it was an issue.

Then all that was left was to add fuel, and:


Wednesday, 3 May 2017

Old Hand Saw Restoration

I found these old saws in my local scrap store for a quid. I've always been a fan of the old-fashioned aesthetic of wooden handles. So being just a quid, I thought I'd grab them, although I wasn't really sure what I wanted to do with them.

Before

A post shared by Anthony (@darkmidnight_diy) on

The Blades
The blades were very rusty, and I wasn't sure if they'd be salvageable. I was only really after the wooden handles anyway, but thought it'd be worth a shot restoring them.

One of the "old-wives tale"-type solutions for rust is white vinegar. I was sceptical, but it's a cheap option, so I gave it a shot, and it worked surprisingly well.

It takes some time, but takes little actual working time - I just set up the blades soaked in the vinegar (I found it easier to wrap the blades in kitchen roll/tissue paper and soaking that, rather than trying to find a suitably sized container).

I did that first thing in the morning, left them most of the day and later rinsed them off and scrubbed the blades. It got the worst off, but there was still a few spots of rust that remained. For that I used a wire brush.

The screws were brass, and cleaned up easily with Brasso.

The Handles
The handle of the tenon saw was in the worst state of the two - removing the blade revealed quite a large crack running from the near screw hole to the hand opening. During disassembly this caused a fragment to break away, but I was able to glue it back neatly with Superglue and it's not noticeable unless it's being looked for.

The flat sides of the handle I sanded with an orbital sander, but sanding the curved areas required a Dremel and a lot of patience.

Once sanded both handles were stained with a redwood stain, applied using a cloth rather than a brush (I find this highlights the natural woodgrain better).

After

A post shared by Anthony (@darkmidnight_diy) on

Now they're restored, I'm still not entirely sure what to do with them. I have plenty of other saws, so it's not like I'll particularly need them for actual work, so I'll likely just use them for some artsy display or something in the workshop.

Side note: After removing all the rust, I discovered this faint engraving on the side of the tenon saw. It says PT2250, and appears hand-engraved.
It's very faint and difficult to photograph clearly, but it's hand written and says "PT 2250". Wonder what it means?