Monday, 27 October 2014

Remastering Tiny Core Linux

Tiny Core Linux is a lightweight Linux distribution designed for Live CD usage. Its low system requirements and small footprint also make it a good candidate for reviving older computers or as a base for building virtual machine appliances.

Unfortunately the remaster tool it includes, which is meant to allow for custom Live CDs to be created with chosen software pre-installed, seems to be buggy, and continually failed when I tried using it, so this is the alternative way I found to remaster TCL.

Step 1
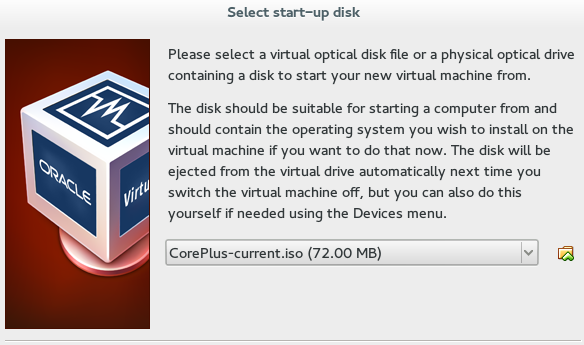
Create a basic virtual machine and boot with the TCL Live CD. I used the CorePlus-current.iso, which has some extra software on there, but is still sub 100MB.


Once it's booted to the desktop select TC Install.


Select USB-HDD, whole disk and 'sda' options on the first screen.

Click through the next two screens (formatting options and boot options)


On the install type I checked the Installer Application option as I might need it in my intended application later, but it's optional.

Click through to the next screen where you're selected options will be repeated back to you, and select Proceed.

When it's done installing, shutdown the VM, remove the Live CD image and restart, so that it boots from the HD.


Step 2
Go to apps, and install the software that you require. In my case I installed Open JDK and Filezilla. (Filezilla also requires libiconv to be installed)


Reboot using the TC Exit options (from the menu go to Logout). The backup options there will essentially create a blank mydata.tgz file structure for you to use later.

Once rebooted, copy the /mnt/sda/tce1 folder off the VM to the host system/memory stick whatever (As I installed filezilla I FTP'd it to another server on my network.)

Step 3 (Optional)
On the host system, edit the mydata.tgz that you copied over, and add in any necessary files that you want on the Live CD. Thanks to the reboot that you did in step 2, mydata.tgz will have a basic file structure in place, that maps to the home and opt directories of the live CD. Also it puts in a couple of SH scripts, bootlocal.sh and shutdown.sh - these handle things that you want to execute on boot and shutdown respectively, edit those if you need to.

Step 4
Use an ISO editor (I used ISO Master).
Open the LiveCD, and navigate to it's 'cde' directory
Copy your mydata.tgz to the ISO, and replace its onboot.lst, and 'optional' directory with your own.

Navigate back to the ISOs /boot/isolinux directory and edit the isolinux.cfg file.
Find the line

TIMEOUT 600

This line causes it to sit on the bootloader screen for 60 seconds, unless the user selects and option.
I want my live CD to boot without user interaction, and that delay is redundant, so I edited it to

TIMEOUT 10

which allows a 1 second delay before continuing to boot the default option.


Save the edited ISO. To test, setup a blank VM like you did in step 1, and select the edited ISO as the boot medium. TCL should load, with your apps and files already there.

Sunday, 19 October 2014

HD44780 LCD to Raspberry Pi

My interest in electronics initially started as a result of PC modding back in the late 90s/early 2000s. Back then, most desktop computers were typical beige boxes - it was all about the internal hardware, not the design of the system itself, and it fell to the users to make then any more interesting than that.

A common mod was to install a LCD screen into the front of the desktop to display things such as system stats (CPU, Memory, temperature), notifications (Email/MSN/ICQ!) or the currently playing track on Winamp.

My old desktop PC has long since been retired, but I still have the LCD that I used, and now I've found an excuse to use it again.

Nostalgia aside, I have a project underway that is going to require a headless Raspberry Pi. While it's easy enough to SSH into the Pi and get to a terminal from another computer, it would also be handy to have at-a-glance stats available.

Fortunately, there's a way to connect a HD44780 LCD (standard text one like mine) to the Pi, using the standard GPIO pins, and leaving the serial pins free (which I'll need for another part of the project).

The thing to be wary of when looking for instructions on connecting one of these displays to a Raspberry Pi is that there are many 'LCD backpacks' and specially designed accessories out there. I'm not using any of those, simply the Pi, the LCD, and a potentiometer to adjust contrast on the display.

Adafruits wiring guide is a good start. While it's aimed at 16x2 displays, it does apply to those of other sizes (the one I'm using is 4x20. They keep referencing their 'Pi Cobbler', though this is simply a breakout board they sell, and it's easy enough to map to the standard Pi pins.
 
A couple of points worth reiterating - the GPIO pins are designed for 3.3v operation, but the LCD for 5v. To avoid 5v being sent to the GPIO, connect the RW pin of the LCD to ground. Also worth noting is the difference between LED and EL backlight. EL has a higher current draw, so trying to power it from the Pi might overload it (LED however is fine). The displays can operate just fine without the backlight, so it's optional anyway. Mine is EL, but I don't really need it, so just left it unconnected.

I was relieved to see that LCDproc is still around. This was the software I used back with my old desktop, so I chose to stick with this instead of the Python solution Adafruit suggest. The pins that they recommend using are slightly different, but can be adjusted in the LCDproc config.

  • To install LCDproc on the Pi, run
    • sudo apt-get install lcdproc
  • Open the config file
    • sudo nano /etc/LCDd.conf 
  • find the line
    • Driver=curses
  • and replace with
    • Driver=hd44780 
  • Find (Ctrl+W) the [hd44780] section and change the ConnectionType line to
    • ConnectionType=rpi 
  • Underneath add the pin mappings in the format shown below 
D7=18
D6=23
D5=24
D4=25
EN=8
RS=7 
 
Even though there is a driver file (hd44780.so) in the driver path, it doesn't seem to work.
Some Google searching found someone else with a similar issue and a replacement driver file, see steps 4 through 10 on there. (though note there's some differences in the rest of their setup to mine, so beware.)

Once that's done, restart LCDd with
  • sudo service LCDd restart
and you should see some text on your LCD!

The default LCDProc screen - the ribbon cable at top left connects to the Pi GPIO.
The small PCB in the top right is a 3.3v to 5v level converter that is to be used for a different project.


Monday, 11 August 2014

Analog pedal to USB keyboard


A lot of my electronics junk box consists of old videogame peripherals, which are often tricky to re-purpose because of proprietary connectors, peripherals, etc.

These pedals, for example, connect to a Playstation steering wheel by a fairly normal 9-pin serial connector, but the wiring isn't standard. Even if it were, most modern PCs no longer have serial ports, so a serial to USB adapter would be needed, and a software solution to make the input useful.

What I'm really after is a drop-in system, that can provide input as if it were a regular keyboard or mouse. The easy way out would be to use a microcontroller to emulate one of those devices, but I want to avoid throwing one at every problem, so I'm going to opt for only using discrete components and a scavenged keyboard PCB.

I'm going to re-purpose this keyboard PCB from the phone scanner project that I did a while ago.

The pedals themselves are essentially just a couple of potentiometers, so in it's simplest form, the contacts for a key could be wired to the pedal. This would mean that as the pedal is pressed, it will reach a point where the resistance is low enough for the signal to pass, however this is quite a simplistic option.


It also seems a shame not to make some use of the fine control of the analog input, so what I have in mind is a two-stage trigger type system - so that a light press of the pedal completes one key, and a complete press sends a second key. For example, a light press could be 'Ctrl', and the full press 'X', to create a pedal for the standard Cut shortcut.

So what's needed is to find a way to create a threshold for when to close the keyboard circuit and trigger the buttons. In order to so this, we can use a low battery circuit, such as the one shown here.

Rather than wait for the power to drop though, we will be using the pedals' potentiometer in place of R4 in the diagram. As the voltage will remain the same, using the pedal to change the low voltage level will change the sensitivity of the circuit, so that when pressed, the LED is triggered. We will also replace the LED in that circuit with an optocoupler, connected to the keyboard matrix for the key that we want.

To create the second stage of the trigger, another copy of the circuit is created, but using a higher value resistor in place of R3, and sharing the same R4 (the pedal). This one will trigger when the pedal is pressed further.
The circuit, with a test potentiometer in place (the upside-down PCB just contains some screw terminals for attaching the potentiometer - see right) Each pair of leads on the left go to the respective terminals on the keyboard PCB (below)
The screw terminal on the underside (on a separate PCB as I scavenged it from the junk box)

The keyboard PCB. The old IDE cable is there to make it easier to patch together the key matrices - In the picture above the leads from the pedal circuit board are connected.


Finally, power is added to the pedals from the keyboards USB connector - see left. This is sufficient to power both the keyboard and the pedal circuit


I have currently only done this for the right-hand pedal, but the same process could just as easily be done for the left (perhaps for other modifier keys - one shift, one ctrl etc).


A test of the pedal in various applications showed it to work, and has proved its usefulness for tedious key combinations in games (such as toggle run/slide etc)


Sunday, 13 July 2014

Dog-controlled treat dispenser part 2


This is the second part of my project to create a dog treat dispenser that my dog, Jack, can operate on his own. For the first part, click here.

Building an enclosure
I thought about 3d-printing an enclosure for the control box, but before I commit the time and effort to designing and printing one, I want to make sure that the project works - and that Jack actually uses it.
So for now, I've managed to fit the electronics into an old business card box, with basic cut outs for the buttons and wiring. It's not pretty, but it works.

The enclosure (the croc clips are for power - final version recycled a charger from a Playstation portable)

The floor switch is connected to the control box by a length of old VGA cable - it's nice and sturdy, and has more than enough wires for this project.

The components for the floor switch


In use
I finally managed to get a short video clip of Jack using it


Future improvements 

The floor switch is too light, as you can see in the video, when Jack uses it, he knocks it across the floor, so I've since mounted it to a bit of wood which helps hold it in place.

The small metal tin that I used to make the contact area larger & easier for Jack to use, ended up making the capacitive switch too sensitive - it basically became like a motion sensor - so I removed that, and used the original metal disc (about 15mm diameter) instead. Although the disc itself is smaller, it still manages to detect capacitance from contact anywhere on the switch, so it works just fine.
The floor switch - unfortunately the hot glue made a bit of a mess, but it's all contained on the underside of the switch, and actually helps diffuse the light a bit.


Source Code (Arduino cores for ATTiny2313
int latchPin = 8;
int clockPin = 12;
int dataPin = 11;
int capBtn = 7;

int plusBtn = 3;
int minBtn = 4;

int enabledLight = 5;

int motorPin = 6;

int treatCount = 0;
int valToDisplay = 0;
int timerBypassPin = 9;
long myTime;
boolean treatEnabled = false;

void setup() {
  //set pins to output so you can control the shift register
  pinMode(latchPin, OUTPUT);
  pinMode(clockPin, OUTPUT);
  pinMode(dataPin, OUTPUT);
  pinMode(capBtn, INPUT);
  pinMode(enabledLight, OUTPUT);
  pinMode(motorPin, OUTPUT);
  pinMode(plusBtn, INPUT);
  pinMode(minBtn, INPUT);
  pinMode(timerBypassPin, INPUT);
  digitalWrite(motorPin, LOW);
  digitalWrite(enabledLight, LOW);
  treatCount = 3;
}

void loop() {
  if (digitalRead(plusBtn) == HIGH) {
    treatCount++;
    if (treatCount > 8) { treatCount = 8; }
    delay(500);
  }
  
  if (digitalRead(minBtn) == HIGH) {
    treatCount--;
    if (treatCount < 0) { treatCount = 0; }
      delay(500);
  }
  
  if (digitalRead(timerBypassPin) == HIGH) {
    treatEnabled = true;
  }
  
  if (
      ((millis() - myTime) < 0) ||
      ((millis()-myTime) >= 3600000)
     ) {
    myTime = millis();
    treatEnabled = true;
  }
  digitalWrite(enabledLight, treatEnabled);

  if (digitalRead(capBtn) == HIGH) {
    if (treatEnabled) {
        digitalWrite(enabledLight, LOW);
        treatEnabled = false;
        treatCount--;
        digitalWrite(motorPin, HIGH);
        delay(3000);
        digitalWrite(motorPin, LOW);
    }
  }
  

  switch (treatCount) {
    case 0: valToDisplay = 0; break;
    case 1: valToDisplay = 1; break;
    case 2: valToDisplay = 3; break;
    case 3: valToDisplay = 7; break;
    case 4: valToDisplay = 15; break;
    case 5: valToDisplay = 31; break;
    case 6: valToDisplay = 63; break;
    case 7: valToDisplay = 127; break;
    case 8: valToDisplay = 255; break;
  }


  digitalWrite(latchPin, LOW);
  shiftOut(dataPin, clockPin, MSBFIRST, valToDisplay);
  digitalWrite(latchPin, HIGH);
  
}

Tuesday, 24 June 2014

Dog-controlled treat dispenser

I picked up one of these treat dispensers from Maplins on a whim - one of those "I'm-sure-I'll-find-a-use-for-this-someday" things. Subsequently I started wondering if I could train my dog, Jack, to use it (with some modifications, obviously)

An initial attempt involved simply wiring a switch to a footpedal for Jack to step on. That lasted all of 10 seconds as the plastic lid I'd repurposed as a pedal cracked under his weight.

One of the things that attracted me to the gadget in the first place was the capacitive button that it used. A quick test with my phone screen showed that dog's paws can operate capacitive switches.

Simply extending the leads alone wouldn't be enough. Although I want to give Jack the freedom to get his own treats, I still want to keep control over how many!

The touch sensors board has simple connections - just power, and leads out to the motor. I didn't really want to waste time modifying the board, as it's all small surface-mount components. Since I know the motor was only driven one direction by the board, I simply connected an optocoupler to the motor outputs. A couple of pull-up resistors later and the switch was done.

The finished capacitive button PCB with optocoupler


I connected a metal lid in place of the small capacitive disc to make it more dog-friendly.

Now onto the human's control system..

My original plan was to use something web connected such as an old android device, so that I could give Jack treats whilst out at work, but in practice, it was totally overkill, so I opted for a microcontroller based system instead.

The only controls I really need are to limit the number of available treats, set a time limit so he doesn't eat them all at once, and a way to see how many were available.

I found an old PCB with two buttons on it in my junk box. One button to add a treat, one to remove.
 
The salvaged button PCB (I believe it once belonged to a toaster...)


For a display I went with a 10-segment LED, controlled by a shift register. Due to the limitations of the shift register, the maximum treats available at any one time is 8 - which is more than enough anyway. The remaining 2 LEDs are left unused.
The 10 segment display (3 treats available) - the bottom 2 LEDs are not used.


The time limit I chose to fix at 1 hour in the microcontroller. As it's impossible to precisely measure the amount of treats that will be dispensed, the motor was set to a 3 second interval.

Finally I added a small LED module to the pedal, that lights when the timer ticks down and a treat is available, so that Jack could see when he can get a treat. According to the Pavlovian theory, he should soon learn that light=treat.

The LED module (it's just from one of those battery operated 'cupboard lights' you see in nearly every pound shop) - for this project I just connected a jumper over the button.


As with other projects I opted for using an Attiny (in this case the 2313) with the Attiny arduino cores, as they make it nice and easy to prototype with Arduino and switch to a regular AVR for the end product.

Stay tuned for part 2 - building an enclosure for it, some pictures of the completed project, source code, and hopefully some pictures/video of Jack using it.

UPDATE - Part 2 is now available here.

Monday, 14 April 2014

Space Invaders alarm clock mod

I'm very conscious of the fact that the last two posts have been quite text-heavy, so here's a lighter weekend project.

I was once given a Space Invaders alarm clock. It's shaped like one of the aliens from the game, the 'pixels' of the LCD display are shaped the same, and when the alarm goes off it makes the aliens sound and moves from side to side as they did in the game.


Which is all well and good unless you have a small bedside table, and the clock just rolls off the edge every morning...

The lazy answer would be to just build a barricade, or some kind of stand that would stop the wheels turning.

Opening up the clock reveals a small PCB, with wires neatly labeled, and a small motor which operates a worm gear to move the wheels.


My plan is to replace the motor, and use it's wires to power some LEDs which I will place in the 'eyes' of the model.

Although labelled "M+" and "M-", the motor wires polarity changes - to allow the change of direction. This is great for motors, but reversing the polarity on an LED will likely result in the magic smoke escaping.

To get around this - and also provide a neat colour change effect - each eye will have 2 LEDs in parallel, and arranged in opposite directions. The LEDs of each colour for each eye will be in series (see below). Also don't forget a 100 Ohm resistor at one of the ends (doesn't match with one)

One green and one red LED per eye. As the current changes the LEDs will alternate


This means that when the current is flowing one way, it can't get through one LED, so moves through the other. When it changes direction, it can no longer get through that one, so it diverts to the other, effectively 'blinking' each LED in turn.

Then it's just a case of drilling eye holes, poking the LEDs through, and reassembling (I also used hot glue to act as a diffuser for the eyes)

Each stage of the end result. It doesn't roll off the table anymore, but I didn't count on it looking a lot more sinister.


Thursday, 3 April 2014

Creating a VirtualBox test system for Raspberry Pi development


Firstly, I'm going to walk through the process of setting up a Ubuntu Virtual Machine (VM) on VirtualBox, which I will use as a test environment for developing for the Pi.

Download the Ubuntu ISO from here if need be.
With VirtualBox installed on your PC. Go to New, and walk through the wizard, allocating memory, and creating a virtual hard disk.

Once that's done, boot the machine, and you'll get a "first-run" type prompt, asking you to select an installation source - direct it to the ISO you downloaded earlier.

Once the VM boots, select Install to hard disk, and walk through the graphical wizard for that. Once complete, reboot the virtual machine.

Once rebooted, login, and open a terminal.
Follow the same instructions to update the system and install the LAMP stack as we did in the post about setting up the Pi.

Once that's done, the next step is to install the VirtualBox 'Guest Additions'. These allow easier interaction between your host system and the VM.
Select this from Devices -> Install guest additions at the top of the VM window. After a few seconds you'll be prompted to run the software in the VM (you'll also be asked to authorise the installation)

Let that run through, and then reboot the VM. Now would be a good time to take a snapshot (Machine->Take snapshot). This effectively creates a backup of the system state at the time it was taken, so if you test something and screw it up, it's fairly trivial to get the system back to how it was.

Now, create a shared folder between the host and the VM - this'll make it easier to move files between them. Right-click on the folder icon at the bottom right of the VM window, and select shared folders. Click the 'Add' button at the right hand side of the dialog that appears - fill in the path, name, and options for the share (Uncheck read-only, check auto mount and make permenant)

You'll now find you have a folder on the virtual machine under /media/sf_FOLDERNAME, where FOLDERNAME is the name you gave your shared folder (eg, mine was named Temp, so on the VM it's /media/sf_Temp). You'll also find you can't access it.
To fix this, in the terminal enter

sudo gpasswd -a USERNAME vboxsf


replacing USERNAME with your own username. You will need to reboot for the changes to take effect.

The final step is to allow the host to access the VM's server.
Go to Machine->Settings->Network, and click Port Forwarding on the network adapter you're using (1 by default)
Click Add, then enter the name (HTTP), host port (I chose 8080), and guest port (80). Click OK.
Now when browsing to localhost:8080 on your host machine, you should see the "It works" page of the web server on the VM.

Take another snapshot here.

This was meant to be a short intro to the main development, but seeing as it's already a lengthy post, I'm going to leave it here, and pick up the rest of the development later.