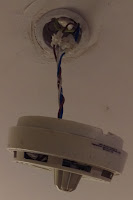
 Over the holidays I broke the smoke alarm in my flat. Not the smoke alarm itself as such, but the mount that held it to the ceiling. Judging by the amount of various adhesives that were on the mount, it looks as though a previous occupant had actually broken the mount, but bodged together enough adhesive to hold it tenuously in place until they left.
First of all, take photos of the object against a plain background. Ideally pick a background which contrasts well against the object that you're trying to copy.
Open the image in a photo editor, and crop any unnecessary bits out the picture.
Create a translucent layer above the current layer, so that you're working on the new layer, but can see through to the photo.
Use the paths tool to trace around the object as best you can, invert the selection and delete the contents. This should remove all the surrounding background bits.
Use the paths tool a few more times to create the cut-outs you require - for example in my case it's removing the centre piece and the screw holes.
Then make the working layer opaque, and fill the outline shape with a colour.
Save and export this image as a PNG.
OpenSCAD is meant to be able to import and extrude PNG files directly, but I've found it to be unreliable, so the below is a workaround that I've been using.
Converting to SVG using Inkscape
Open the edited image into a vector graphics editor, such as Inkscape.
Click on the image, right click and select "Trace Bitmap". Select "Edge Detection". If the image being used is simple enough, you can leave the default values, click OK, and then close the menu.
Drag the bitmap out the way (you can delete it now), and you should be left with an outline of the object. Fill the outline with a colour to make the object solid.
Save this SVG file.
Extruding the file in Blender
Open Blender.
Go to File, Import, Scalable Vector Graphics (SVG). Find the file and select it.
You may have to zoom quite far in to see the imported object.
Select the object and move it slightly, you'll see a second outline object that gets left behind. Click on the outline object and delete it, you don't need it here, then replace the rest of the object.
Next we need to set the units of the object, so that we can scale it properly. Click the Scene properties tab on the right, and select Metric or Imperial from the units section.
Next, we scale the object.

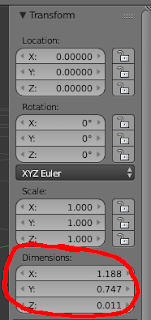
 Press N to bring up the information about the object, and get the dimensions.
Set the X and Y scale here, but for the Z axis we need to extrude the flat image into a 3D object.
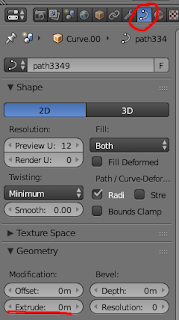
To do this, go to the right hand side and select object data, geometry, extrude.
In the case of my project, I added a couple of extra objects to recreate the latches which were broken off the original mount.
Once this is done export to STL and you have a file ready to send to the 3D printer.
 |
| Left, the original broken mount, and right, the 3D printed replacement. |


